
Today I’ve got a super quick and simple Christmas Craft idea for you! I’m going to show you how to use your Cricut Maker to cut out felt pieces to make a Felt Holly Christmas Garland. I’ve even included the holly images as a Cricut SVG file download for you!
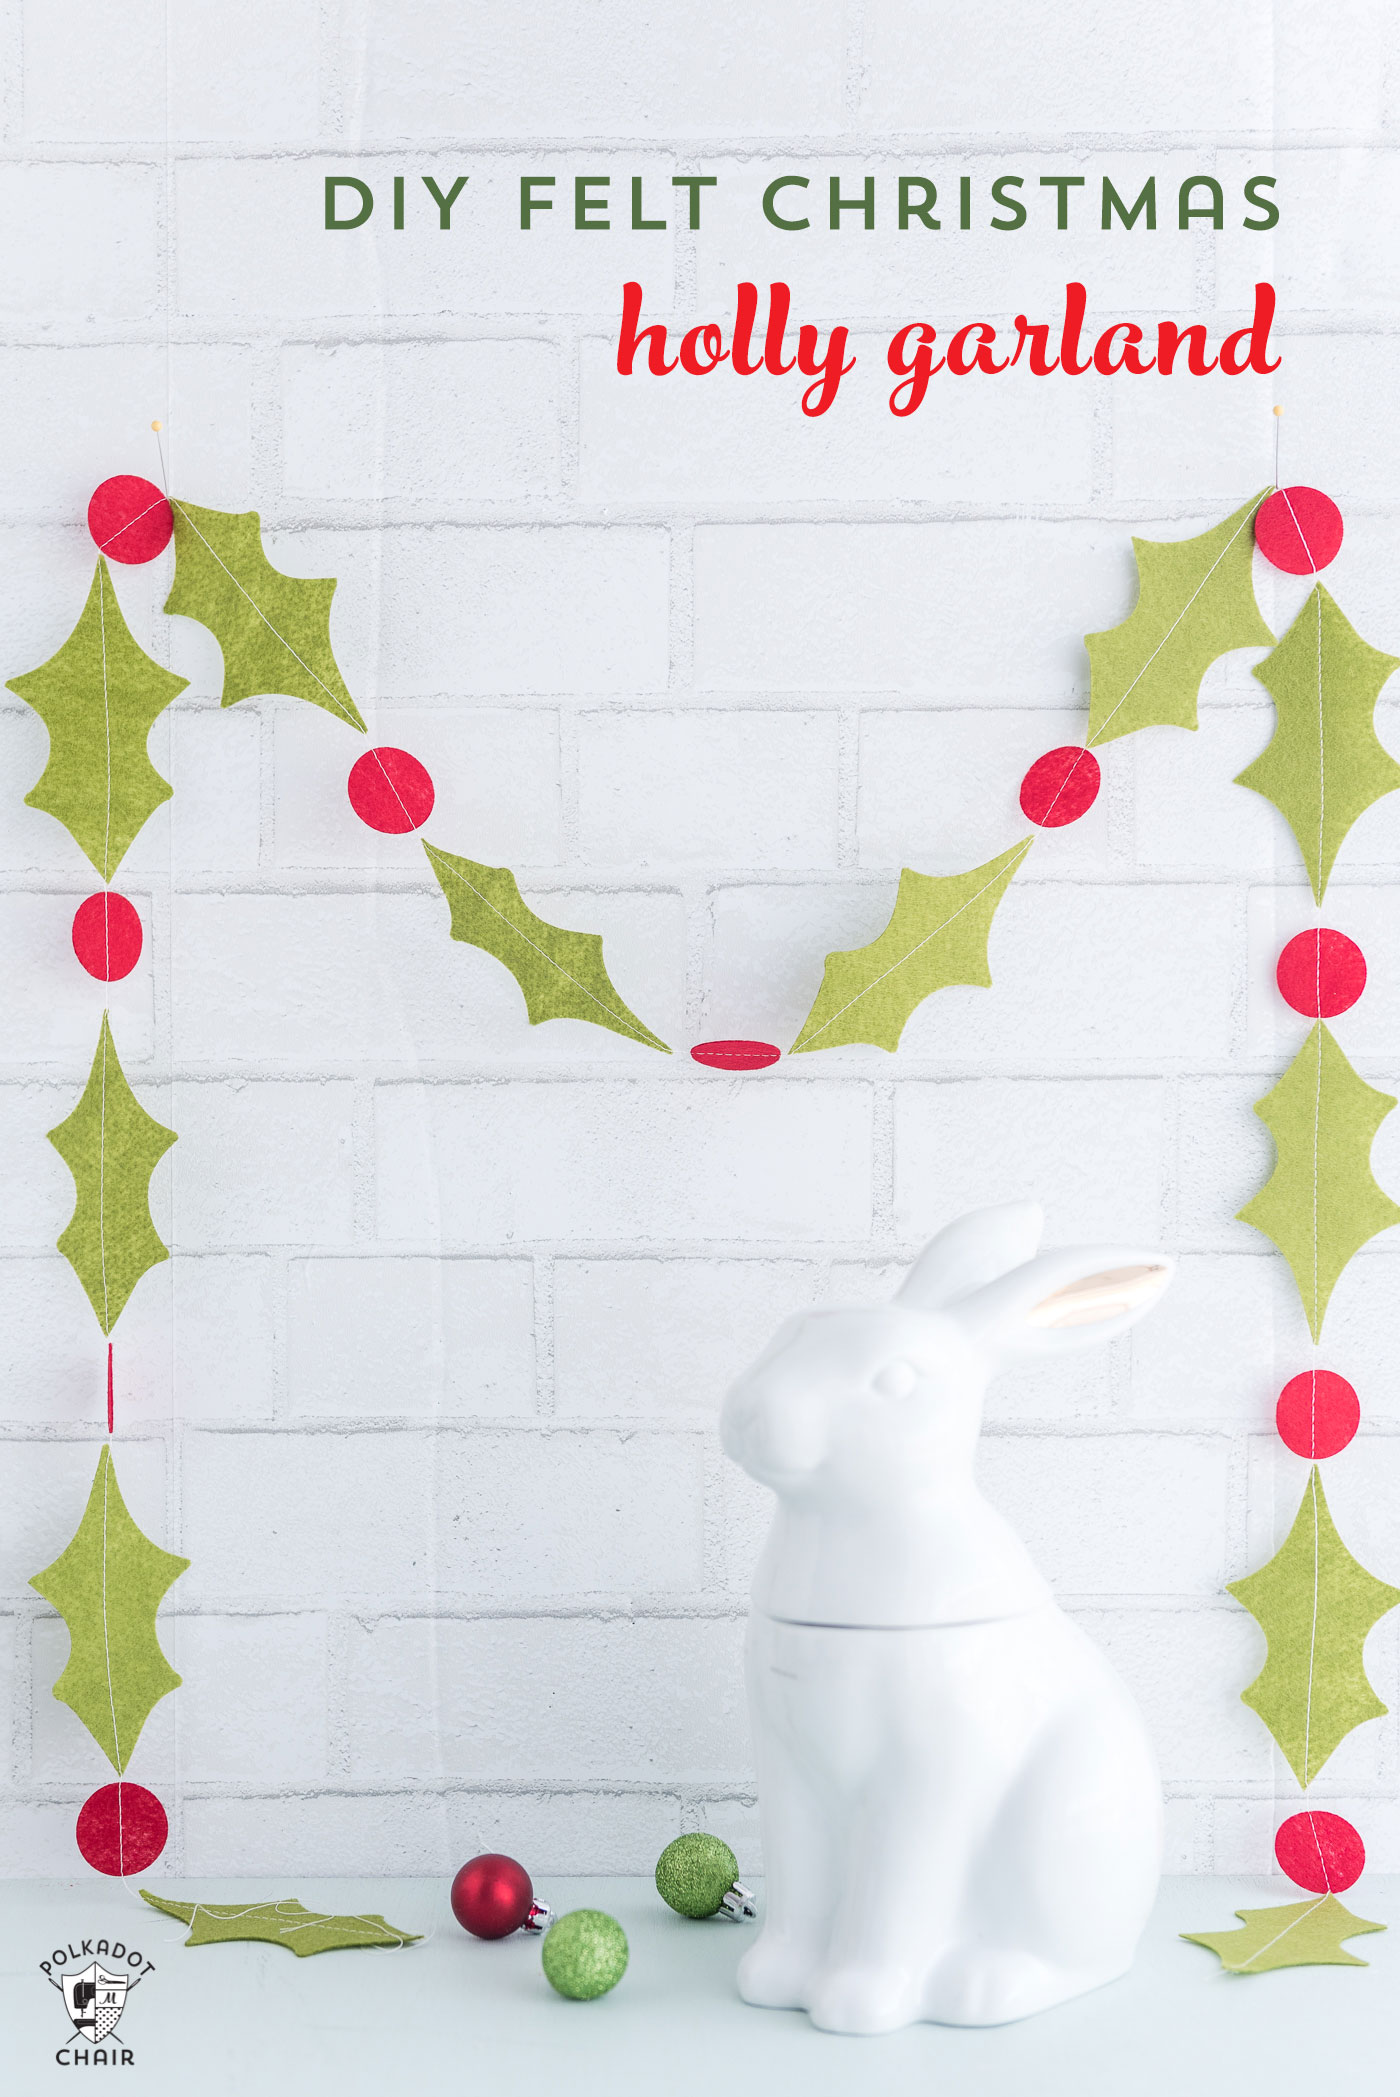
I love crafting for Christmas, but sometimes find myself short on time during the Holidays. Today’s project is just the kind of thing that I love to make during the Christmas season. It’s simple, and quick yet makes a big statement. How cute would a bunch of these look strung on a white flocked Christmas tree? (actually, that just gave me a good idea, hmmmmmm…)
Holly Berry Felt Christmas Garland Tutorial
The Cricut Maker is going to handle most of the work on this project. It will cut out all of the felt images for you. All you have to do at the end is sew a straight stitch to attach the garland pieces together. Easy peasy!
I work as a brand ambassador for Cricut, this post contains affiliate links.
Supplies for Felt Christmas Garland:
Cricut Maker Machine and Rotary Blade Attachment
Cricut Felt in Red & Green (from the Sky Sampler Pack)
Holly Berry Image Download on the Cricut Downloads PAGE
Sewing Machine (all you need is a straight stitch)
Here’s a tip for you. If you are using another brand of felt (besides the Cricut brand), you may notice that the felt is super fuzzy and the “fuzz” from the felt will dull the sticky on your cutting mat. To fix this, apply a piece of Cricut transfer tape to the back of your feet BEFORE you attach it to the cutting mat. The transfer tape will hold the “fuzz” leaving your mat mostly fuzz-free.
To create the Holly Berry Garland:
Open the Holly Berry file in Design Space. Size it the size that you want. Take note, the Maker can not cut curves/circles smaller than ¾ with the rotary blade. So don’t make it too small!
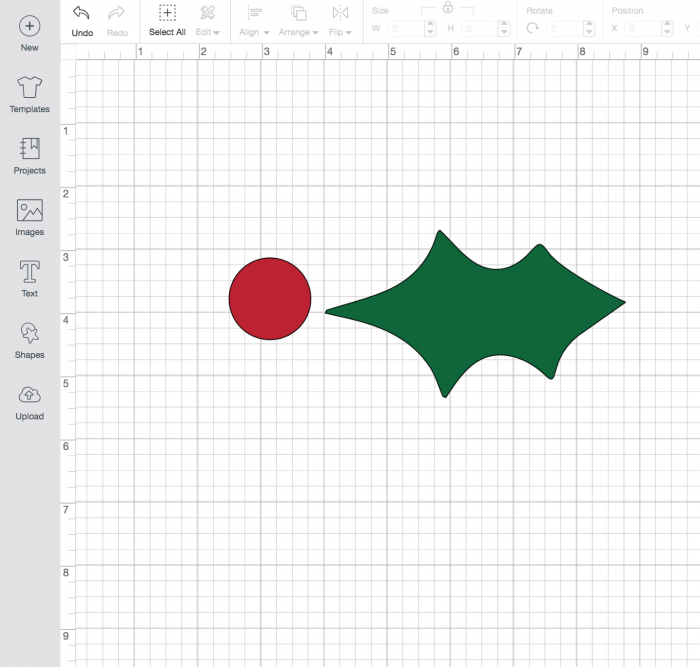
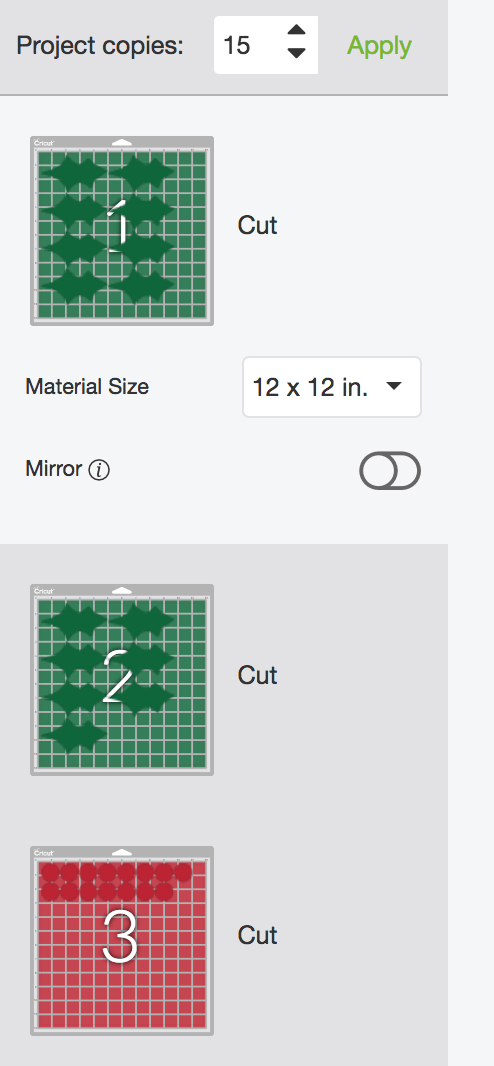
In the upper left corner change the project copies to the number you want.
It will automatically space the berry centers on different mats that the holly leaves.
Select FELT as your material, and change the blade to the Rotary Blade.
Load the mat and cut.
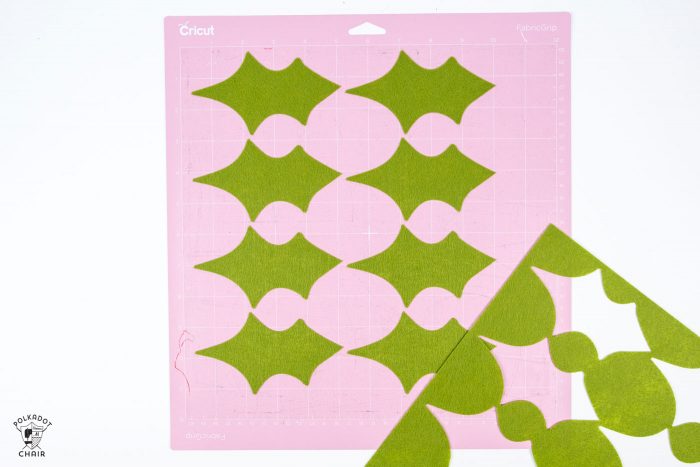
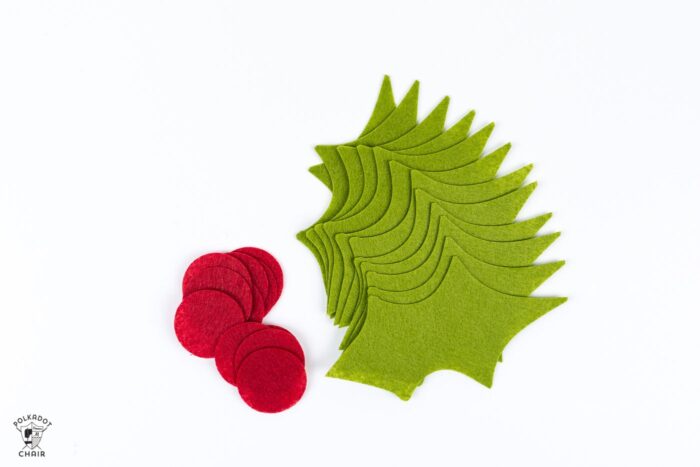
After you are done, peel the pieces off of the mat, and put into 2 piles, leaves and berries.
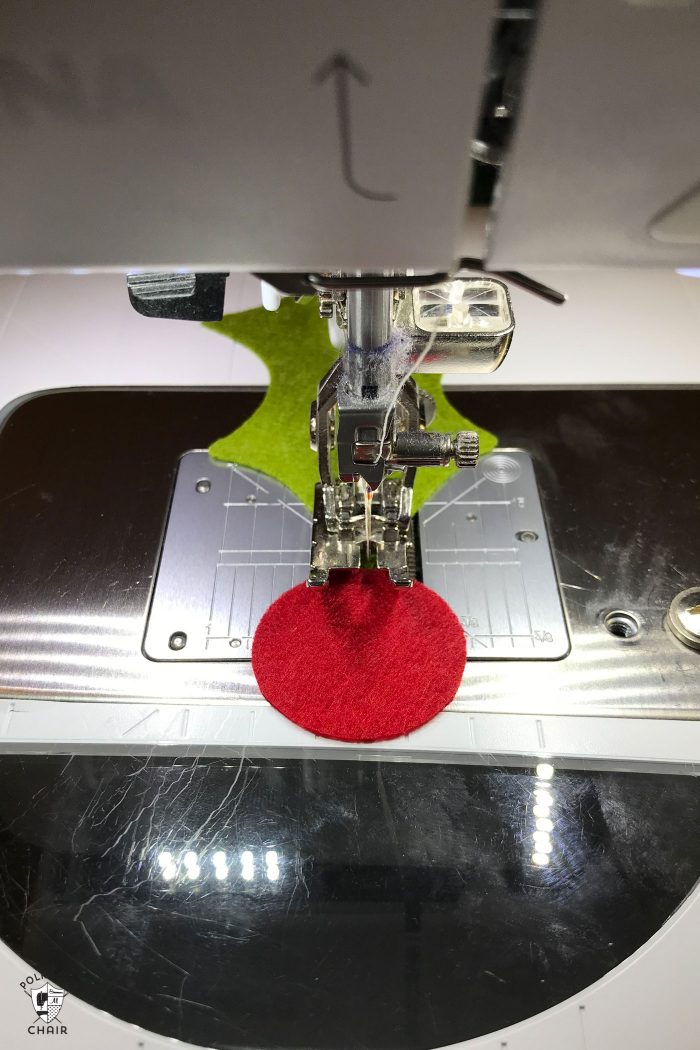
Now simply use your sewing machine to stitch the berries and leaves together in a garland. Just alternate berries and leaves and leave 1 stitch between each as you go.
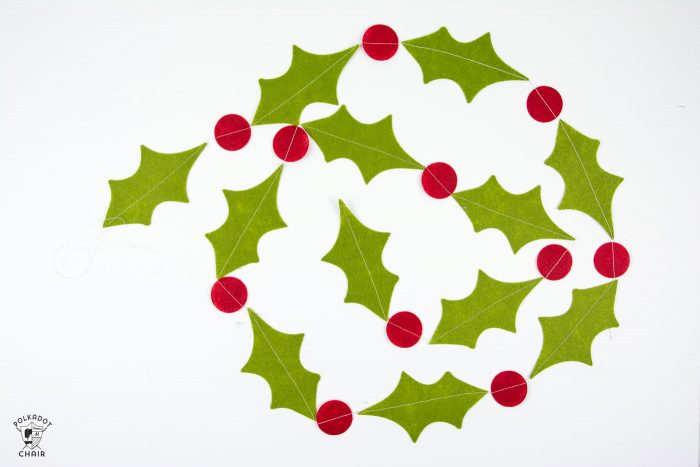
That’s it! You’re done!


Kathy says
Can this be done on a Cricut Expression machine?
Emily Conner says
Nice post!!!